Introduction
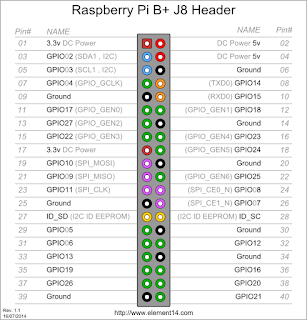
On the Raspberry Pi Model B+ board, there are many GPIO ports, here we make a simple test, and try to understand how to control GPIO ports by python?
Concept of hardware control
Generally, an IO port of an IC (e.g. MCU, ARM, GPU) could be have multiple functions. So, when we write a control program to control these IO ports, it can be in 3 steps:
1) Configure the hardware function
2) Execute the control function
3) Release the hardware function
Install RPi.GPIO package
There are many libraries(such as RPi.GPIO, WiringPi, or pigpio library) can do the GPIO control. At here, we are using RPi.GPIO library.
Usually, read or write GPIO, the user must be root.
Install packages:
# yum update
# yum install python-setuptools
# yum install python-pip
# easy_install pyerial <== serial communication package
# yum install python-devel
# pip install RPi.GPIO <== GPIO control package
# pip install cython
# reboot
Write a GPIO input/output control program
We write a simple test program to test the GPIO functions. We define functions:
GPIO12 (pin32) - output pin
GPIO13 (pin33) - input pin
Example code:
====================================================================
import time
import RPi.GPIO as GPIO
import kbhit # read keybard value, source code is at bottom
def InputEvent(channel):
# got input event
print "[INPUT] Got input event."
if __name__ == '__main__':
# configure the GPIO hardware condition
GPIO.setmode(GPIO.BCM)
GPIO.setup(12, GPIO.OUT) # GPIO12, pin32, output control
GPIO.setup(13, GPIO.IN, pull_up_down=GPIO.PUD_UP) # GPIO13, pin33, input control
GPIO.add_event_detect(13, GPIO.FALLING, callback=InputEvent)
kb = KBHit()
bPin32On = False
while True:
# if the 'ESC' key is pressed, stop the while loop
if kb.kbhit():
c = kb.getch()
if ord(c) == 27: # ESC
break # Set On/Off pin32
print "[OUTPUT] Set output event."
if bPin32On: # True
GPIO.output(12,GPIO.HIGH)
else: # False
GPIO.output(12,GPIO.LOW)
# switch signal
bPin32On = not bPin32On
time.sleep(2.0)
kb.set_normal_term()
# release the hardware configuration
GPIO.cleanup()
====================================================================
Get the keyboard value
The KBHit class is used to monitor the non-blocking keyboard event.
Source code:
====================================================================
import os
# Windows
if os.name == 'nt':
import msvcrt
# Posix (Linux, OS X)
else:
import sys
import termios
import atexit
from select import select
class KBHit: def __init__(self):
'''Creates a KBHit object that you can call to do various keyboard things.
'''
if os.name == 'nt':
pass
else:
# Save the terminal settings
self.fd = sys.stdin.fileno()
self.new_term = termios.tcgetattr(self.fd)
self.old_term = termios.tcgetattr(self.fd)
# New terminal setting unbuffered
self.new_term[3] = (self.new_term[3] & ~termios.ICANON & ~termios.ECHO)
termios.tcsetattr(self.fd, termios.TCSAFLUSH, self.new_term)
# Support normal-terminal reset at exit
atexit.register(self.set_normal_term)
def set_normal_term(self):
''' Resets to normal terminal. On Windows this is a no-op. '''
if os.name == 'nt':
pass
else:
termios.tcsetattr(self.fd, termios.TCSAFLUSH, self.old_term)
def set_curses_term(self):
''' switch to unbuffered terminal
:return:
'''
if os.name == 'nt':
pass
else:
termios.tcsetattr(self.fd, termios.TCSAFLUSH, self.new_term)
def putch(self, ch):
if os.name == 'nt':
msvcrt.putch(ch.encode('ascii', 'ignore'))
else:
sys.stdout.write(ch)
def getch(self):
''' Returns a keyboard character after kbhit() has been called.
Should not be called in the same program as getarrow().
'''
s = ''
if os.name == 'nt':
return msvcrt.getch().decode('utf-8')
else:
return sys.stdin.read(1)
def getche(self):
ch = self.getch()
self.putch(ch)
return ch
def getarrow(self):
''' Returns an arrow-key code after kbhit() has been called. Codes are
0 : up
1 : right
2 : down
3 : left
Should not be called in the same program as getch().
'''
if os.name == 'nt':
msvcrt.getch() # skip 0xE0
c = msvcrt.getch()
vals = [72, 77, 80, 75]
else:
c = sys.stdin.read(3)[2]
vals = [65, 67, 66, 68]
return vals.index(ord(c.decode('utf-8')))
def kbhit(self):
''' Returns True if keyboard character was hit, False otherwise.
'''
if os.name == 'nt':
return msvcrt.kbhit()
else:
dr,dw,de = select([sys.stdin], [], [], 0)
return dr != []
====================================================================
Conclusion
Python is a powerful programming tool, it can satisfy the most requirements of our daily tasks. If you want to get the high performance of a program, assember, C, or C++ would be the best choice.
Reference
RPi.GPIO
Python.org
